
This post contains affiliate links — if you buy through them I may earn a small commission, at no extra cost to you. Thanks for supporting the bakery!
The timer goes off, the edges look done, and the middle looks suspiciously raw. Now you’re standing in front of the oven negotiating with a cookie: Do I pull it? Do I give it another minute? Is it gooey? Is it raw? Am I about to ruin this entire batch?
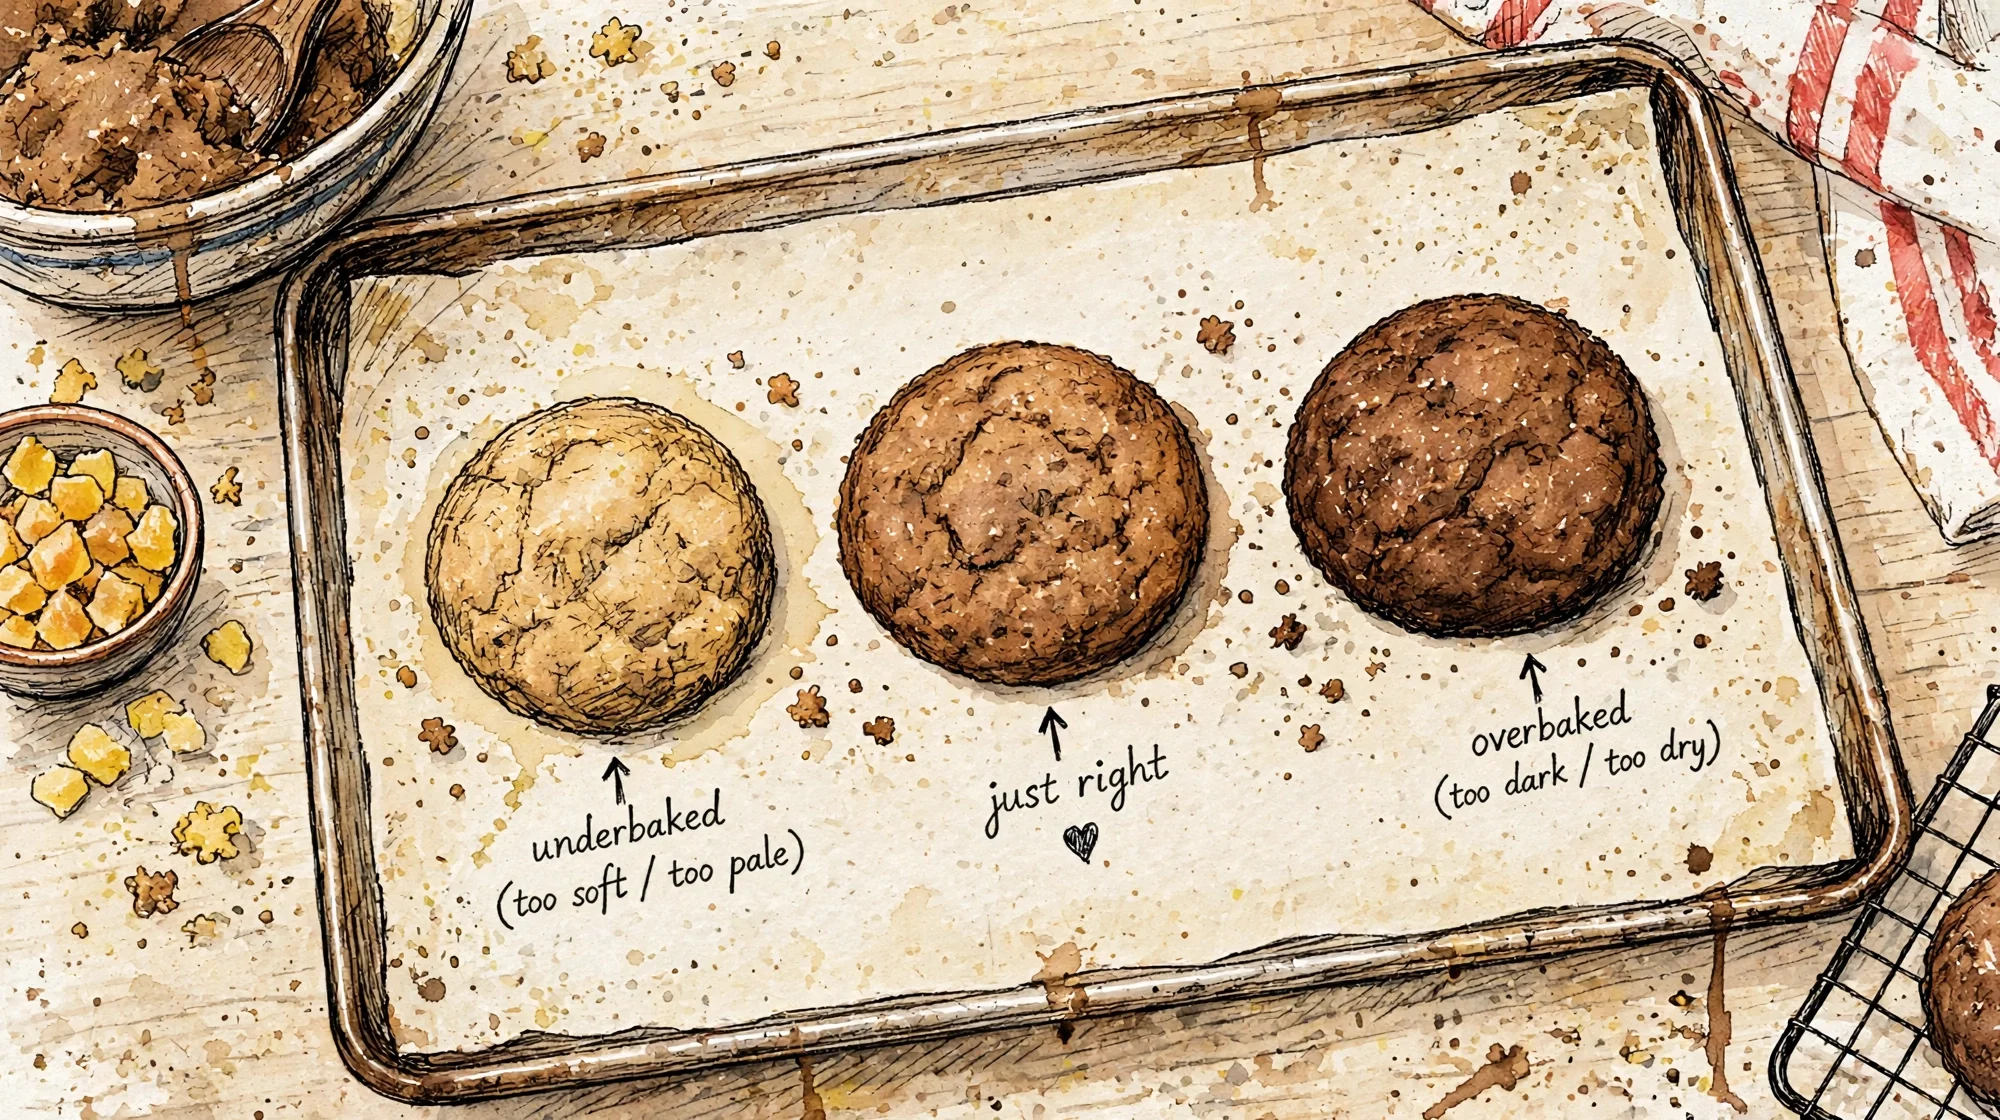
This is one of those parts of baking that sounds incredibly simple until you’re actually doing it. Recipes will tell you to bake something for 10–12 minutes, but unfortunately, your cookie does not own a watch. Your oven temperature, dough temperature, cookie size, baking sheet, and even where the tray sits in the oven can all change how quickly a cookie bakes.
That’s why I’ve learned to use the timer as a reminder to start looking, not as an instruction to immediately pull the pan.
Stop watching the clock
The first thing I had to learn was that baking time is usually a range for a reason. Your oven might run a little hot while mine might run a little cool… which is why I keep a cheap oven thermometer in there. Your dough may have gone straight from the refrigerator into the oven, while mine sat on the counter for fifteen minutes because I got distracted doing something completely unrelated.
Even changing the size of the cookie matters. A little 30-gram cookie and a giant 60-gram cookie obviously aren’t going to bake at exactly the same rate, even if they came from the same bowl of dough.
So when the timer goes off, I don’t immediately ask, “Has it been 11 minutes?” I start looking at the cookie itself.
Start with the edges
The edges are usually the first part of the cookie to tell you what’s happening. For most cookies, I want them to look set and structured. They shouldn’t look wet or like they’re going to immediately melt back into the pan. Depending on the recipe, they may also be lightly golden.
But here’s the part that took me a while to trust: The center does not need to look as done as the edges.
Actually, if I’m making a soft or chewy cookie, I usually don’t want it to. If you wait until the entire cookie looks completely firm while it’s still in the oven, there’s a pretty good chance you’ve gone too far, because the baking does not stop when you open the oven door.
The pan is still doing work
Your baking sheet is HOT. Obvious, yes, but it’s easy to forget that when you’re looking at a cookie that seems slightly underdone.
Once you pull the tray from the oven, the cookie continues cooking from the heat of the pan. The center firms up, the structure sets, and some of that slightly scary softness disappears. This is why I usually let cookies rest on the baking sheet for around five minutes before moving them to a cooling rack.
Sometimes the cookie you were convinced was underbaked looks completely different a few minutes later. And if you try to move it immediately and it collapses into your spatula, that doesn’t automatically mean you messed up. It might just mean you need to leave it alone — a lesson that applies to cookies and, frankly, many other things.
Soft is good. Wet is not.
This is probably the hardest distinction to learn. A cookie can look soft in the center and still be done, and soft can be great. That’s how we get a chewy, slightly gooey middle instead of something that requires a glass of milk just to make it through.
What I don’t want is a center that still looks like raw dough. There should be some structure. The middle may still look puffed, delicate, or slightly glossy, but it shouldn’t look wet and paste-like.
That’s the difference I’m looking for: Gooey has structure. Raw dough does not.
If you break open a finished cookie and the center looks essentially the same as the dough did before baking, you did not create a molten center. You created raw cookie dough. Nice try, though.
Look at the shine
One visual cue I use all the time is the surface of the cookie. Raw dough tends to look shiny, and as it bakes, that wet-looking shine gradually disappears and the surface becomes more matte.
That doesn’t mean every single shiny spot needs to disappear before you pull the tray. In fact, for some cookies, I want the very center to still look a little soft. But if the entire top still looks glossy and wet, I’m usually giving it another minute.
This is one of those tiny things you start noticing once you’ve baked the same cookie enough times. Eventually, you stop thinking about it and just look through the oven door and think, “Nope. Not yet.”
Color can help you. Sometimes.
A lot of recipes say something like, “Bake until golden brown.”
Cool. Unless the cookie isn’t supposed to be golden brown.
Shortbread can stay fairly pale. Dark brown sugar can make one cookie look more baked than another. Chocolate cookies make the entire concept of judging by color basically useless. And a dark baking sheet can brown the bottom of your cookie much faster than a light-colored aluminum pan.
So I look at color, but I don’t let color make the entire decision. A golden edge can be a clue; it is not a universal definition of done.
And yes, size matters
This seems obvious until you start changing recipes. Maybe the recipe calls for twelve cookies at a certain weight, but you decide you want six enormous ones. I support this decision. However, your baking time is going to change.
A thicker cookie needs more time for heat to reach the center, which means the outside can look beautifully done while the middle is still genuinely raw. The same thing happens with really cold dough. If your cookie dough goes into the oven straight from the refrigerator, the center is starting much colder than dough that has been sitting on the counter.
That doesn’t mean you need to bring chilled dough completely to room temperature. It just means you may need to adjust the bake. This is why the clock alone can only tell you so much.
When I’m not sure, I sacrifice one cookie
If I’m testing a new recipe — or even baking an old recipe under slightly different conditions — I’ll sometimes bake one cookie first. I check it around the suggested bake time, let it sit on the pan for a few minutes, and then break it open.
If it’s too raw, the next batch gets another minute or two. If it’s too dry, I pull the next tray earlier. If it’s perfect, excellent. Now I know.
This is one of the easiest ways to learn what a particular dough needs without risking the entire batch. Plus, someone has to eat the test cookie. Very difficult work.
So what does “done” actually look like?
That depends on the cookie, and I think that’s the most important part.
A crisp cookie should not look exactly like a chewy cookie. A shortbread cookie should not look like a giant bakery-style chocolate chip cookie. A thin cookie that’s supposed to have crunchy edges is going to tell you it’s done differently than a thick cookie with a soft center.
There is no single moment when every cookie becomes “done.” What you’re really learning is what this specific cookie should look like when it’s ready.
For a soft chocolate chip cookie, I’m probably looking for set edges, a mostly matte surface, a center that still looks soft, and enough structure that I know the pan can finish the job. For something crispier, I may let the color develop more and allow the center to firm up further.
The more you bake, the more these decisions stop feeling like guesses. You start recognizing the signs.
One last thing
I used to think being a good baker meant knowing exactly how many minutes something should stay in the oven. Now I think it’s almost the opposite.
You learn when to stop trusting the timer. You look at the edges, notice the shine, remember that the pan is still hot, and let one cookie cool before deciding the whole batch is wrong.
Eventually, you stop asking, “Has it been 11 minutes?” and start asking, “Does this look like the cookie I’m trying to make?”
That’s when baking starts feeling a lot less like following instructions and a lot more like knowing what you’re doing.